


If the past decade’s kitchen trends were defined by “smart” and “convenient,” the new buzzwords are “energy-efficient” and “long-lasting.” As demand for healthy eating grows, a kitchen gadget that “cooks on its own”—the vacuum thermal cooker—is quietly taking over modern homes. No need for constant power or babysitting; it uses “trapped heat” to finish slow cooking. It redefines cooking logic, making “effortless” and “efficient” two sides of the same coin.
As a reliable manufacturer of Vacuum Thermal Cookers, I would like to introduce you to what this product is and how it works. If you have bulk purchasing requirements for Vacuum Thermal Cookers, please feel free to contact us at any time for further product information and wholesale solutions.
What Is a Vacuum Thermal Cooker?
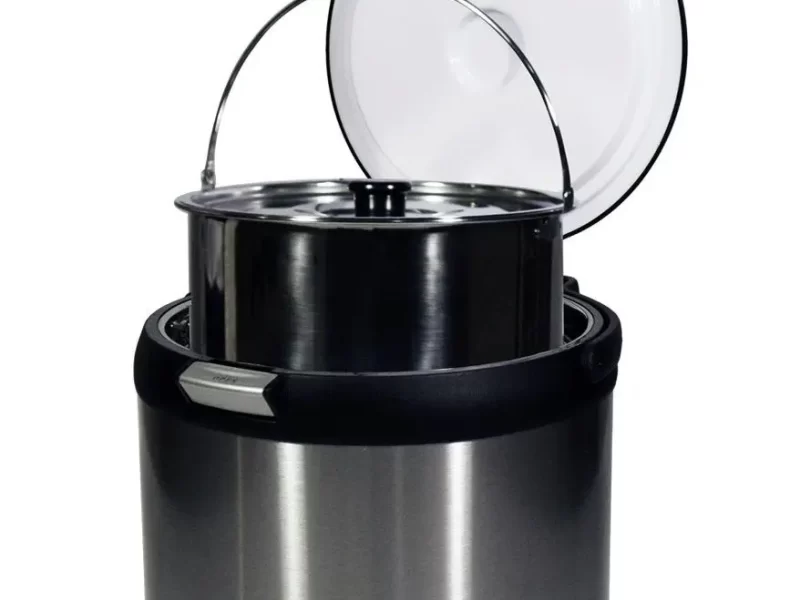
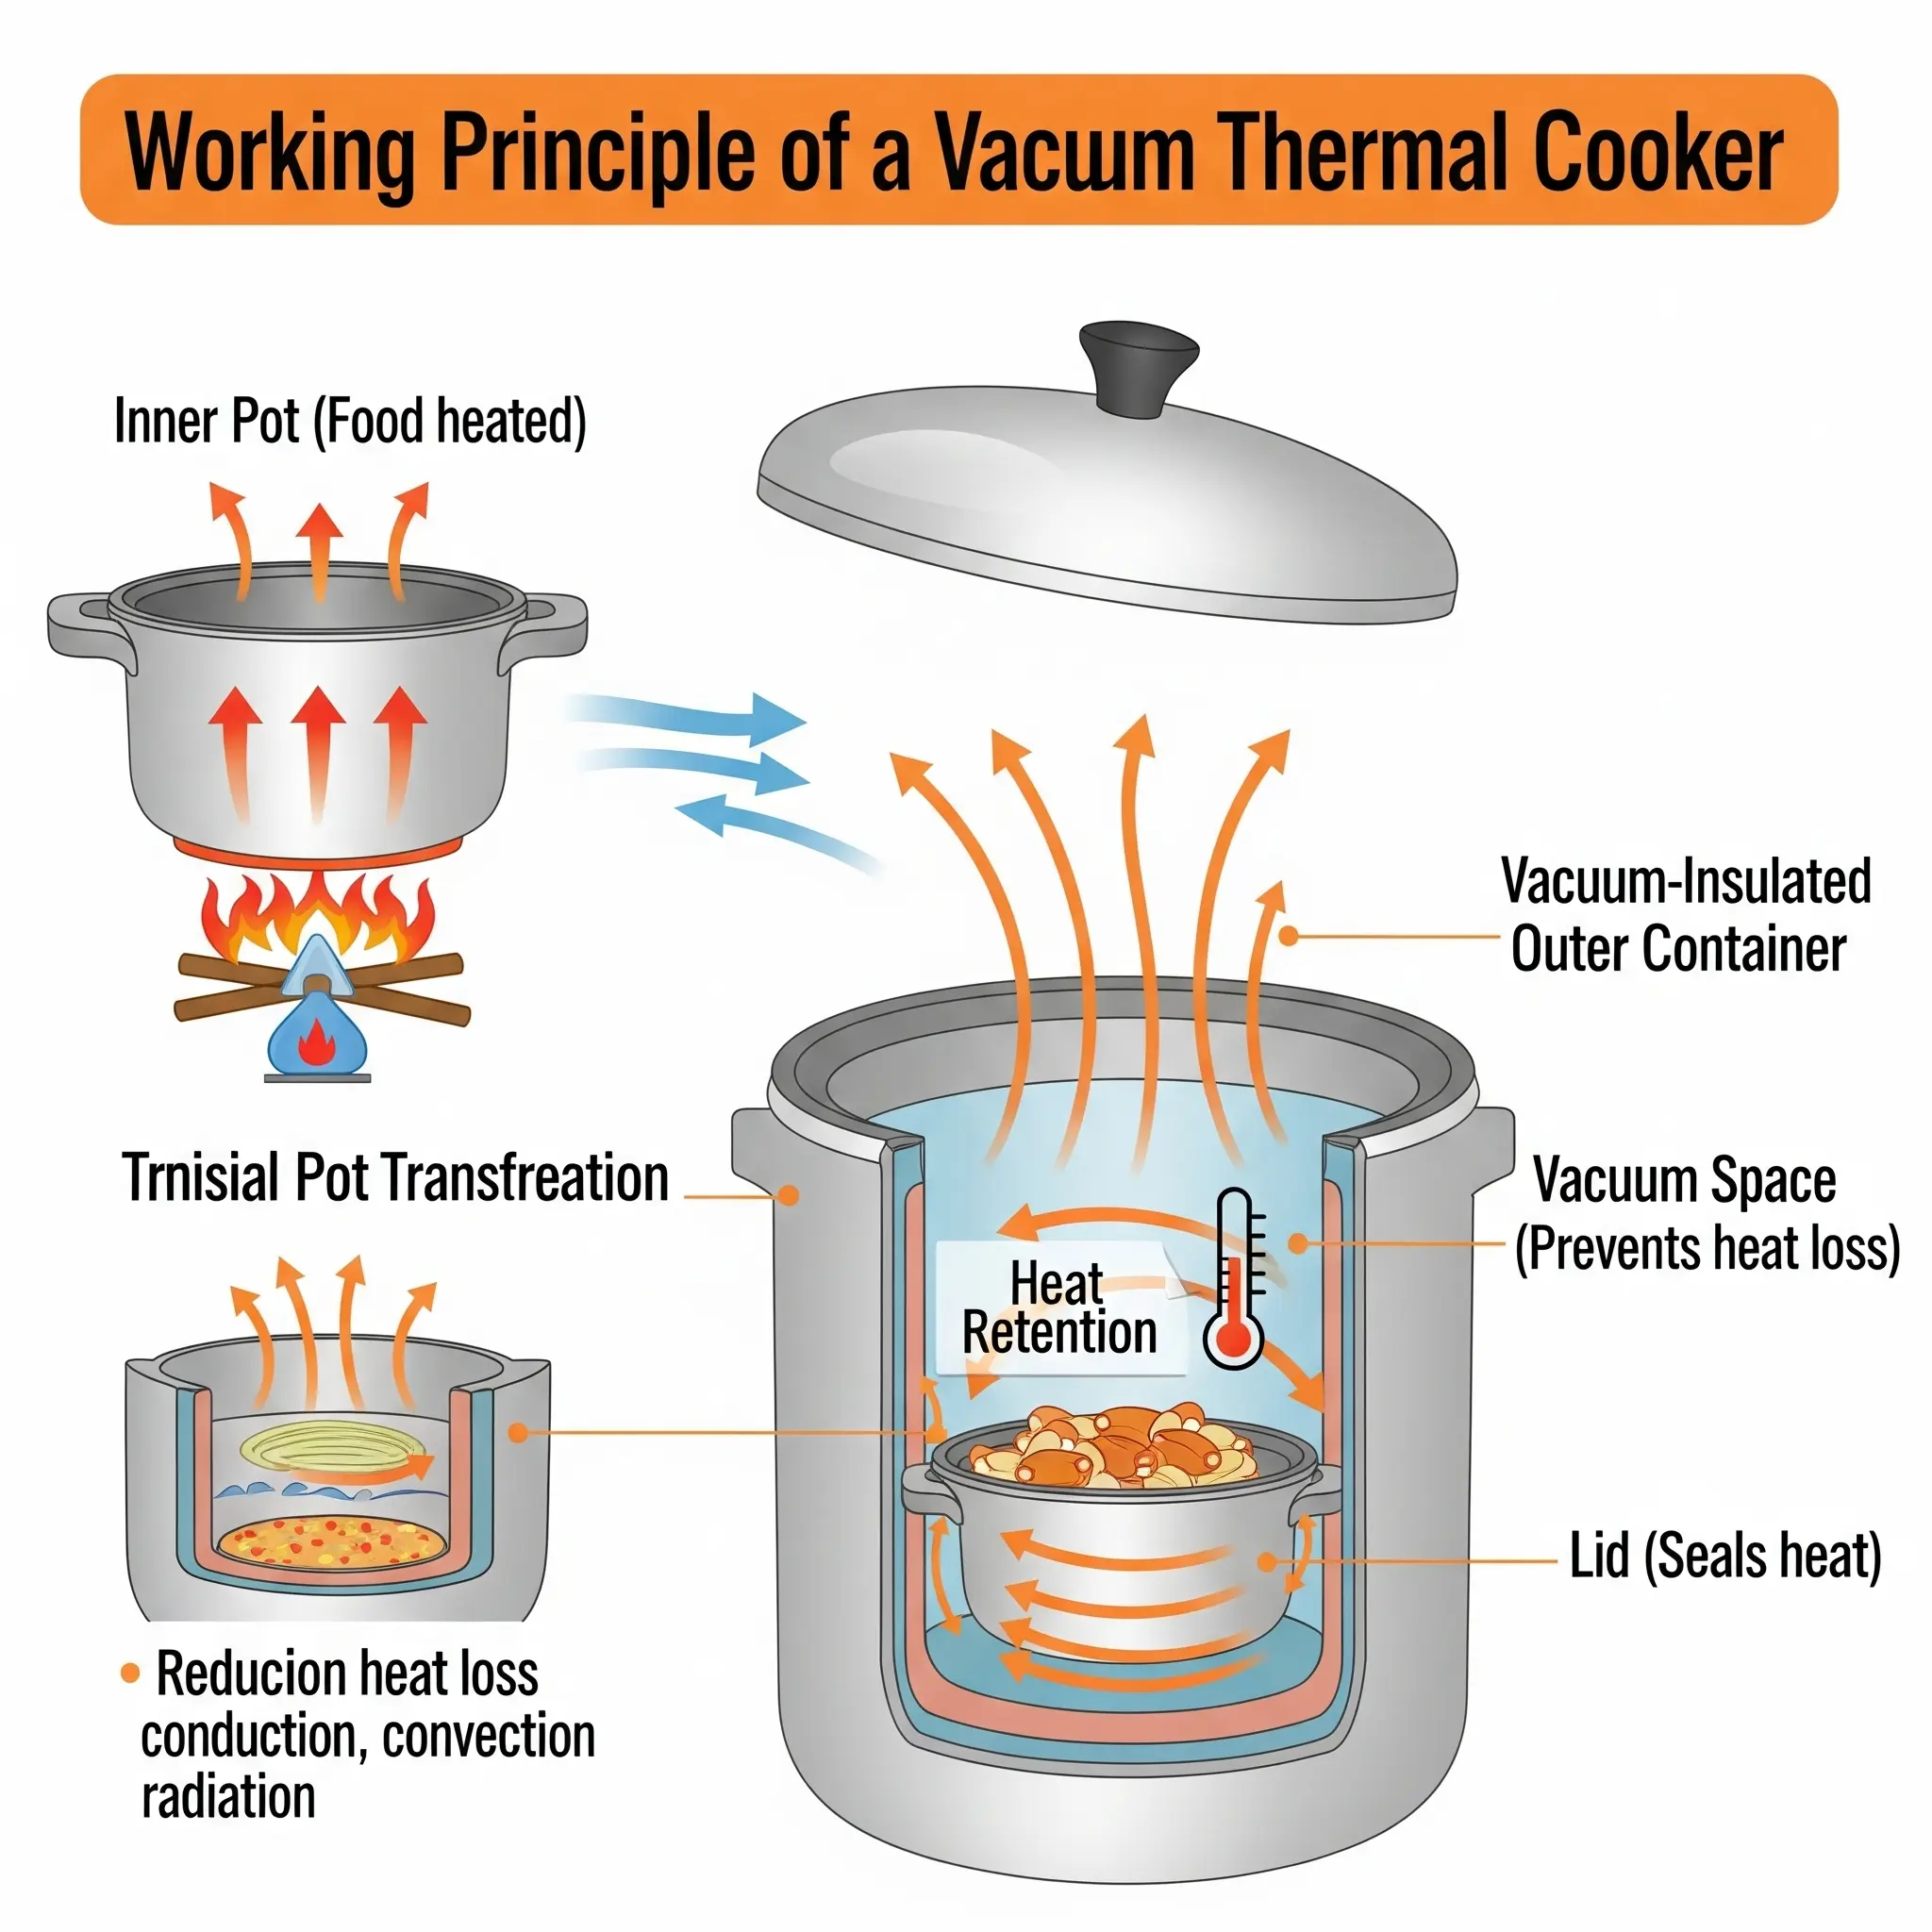
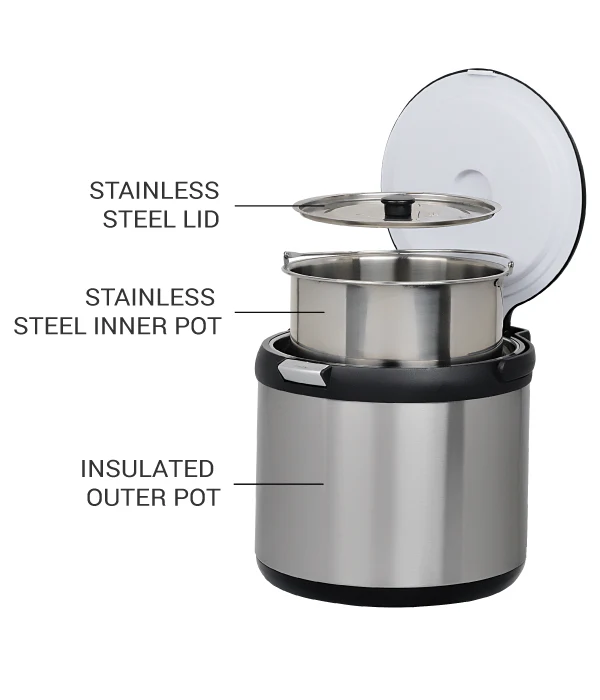
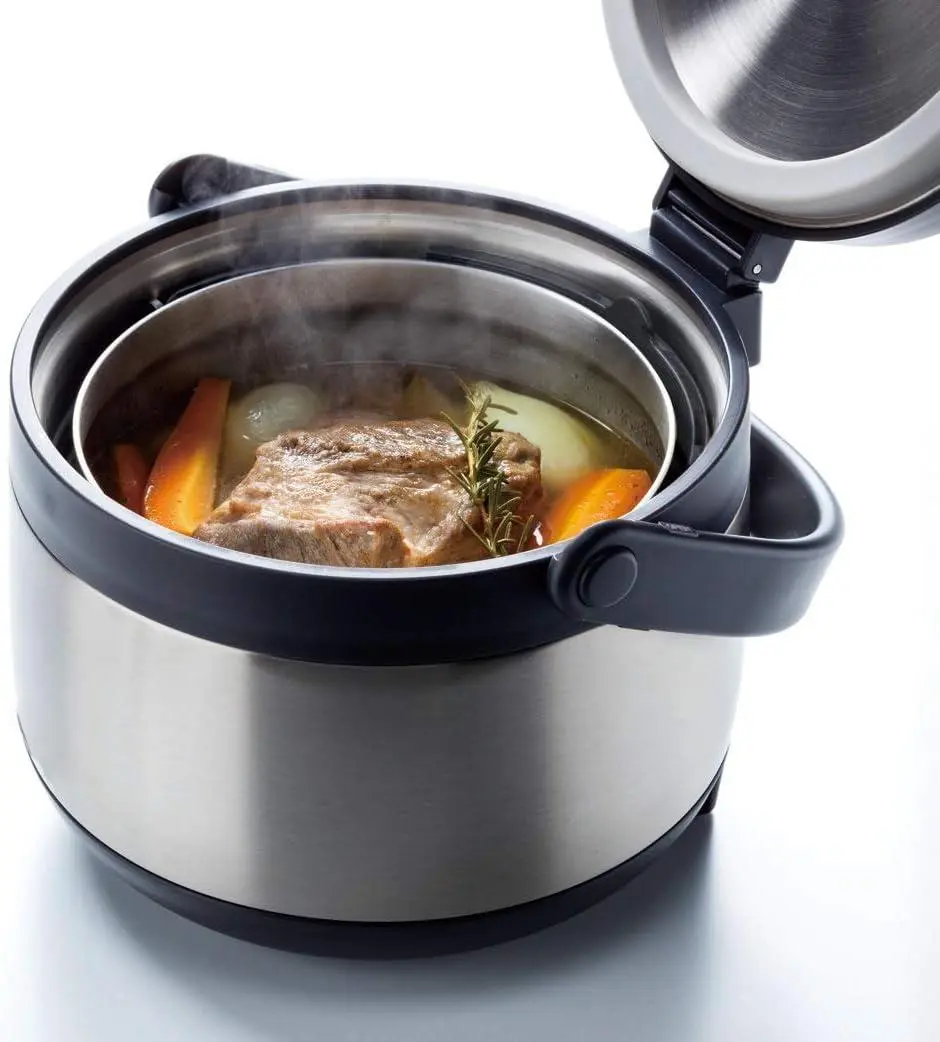
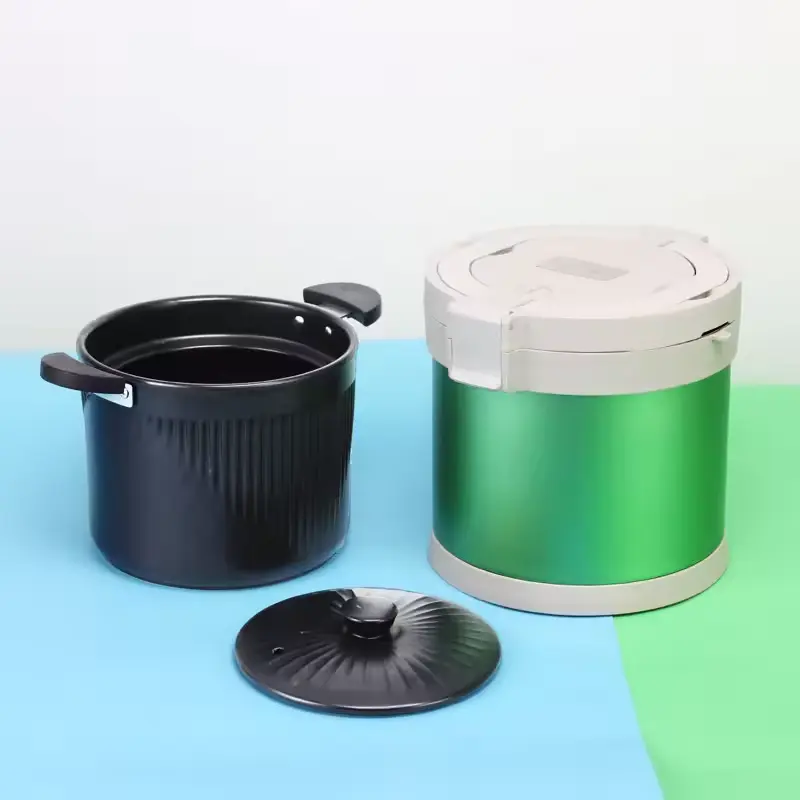
A vacuum thermal cooker is essentially a “dual-layer insulation system”: an inner pot (stainless steel) for initial cooking, and an outer insulated container. Unlike traditional pots that lose heat while heating, its core mission is “blocking heat escape”.
Here is how: Boil or pre-cook ingredients in the inner pot, place it into the outer container, seal it, and the vacuum layer hold and retain the heat. This keeps internal temperatures between 80-100°C for hours, letting ingredients slow-cook or braise automatically.
Compared to slow cookers, vacuum thermal cookers use residual heat post-boiling. It’s built with food-grade 304 stainless steel inner pots, multi-layer vacuum insulation with copper/aluminum foil to reflect radiant heat, and airtight lids that handle boiling temperatures. It’s versatile—from soups to stews.
How Vacuum Thermal Cooking Locks in Heat
Let’s revisit two physics basics: heat transfer (conduction, convection, radiation) and the vacuum’s insulation superpower. Traditional pots lose heat through three paths: metal walls conduct heat to food, but the pot’s surface also loses heat via air contact (convection) and radiation.
Vacuum thermal cookers block these:
- Vacuum layer between inner and outer containers: With almost no air molecules, convection is eliminated. The inner vacuum walls are coated with copper/aluminum foil to reflect radiant heat.
- Sealed inner pot: Steam from boiling ingredients stays trapped, creating a “micro-pressure environment” that slows water evaporation, stabilizing temperatures.
Inside the Cooker: Why Details Matter for Performance
The soul of a vacuum thermal cooker lies in the details you don’t see. Its simple design hides three critical components, each engineered for maximum heat retention and safety.
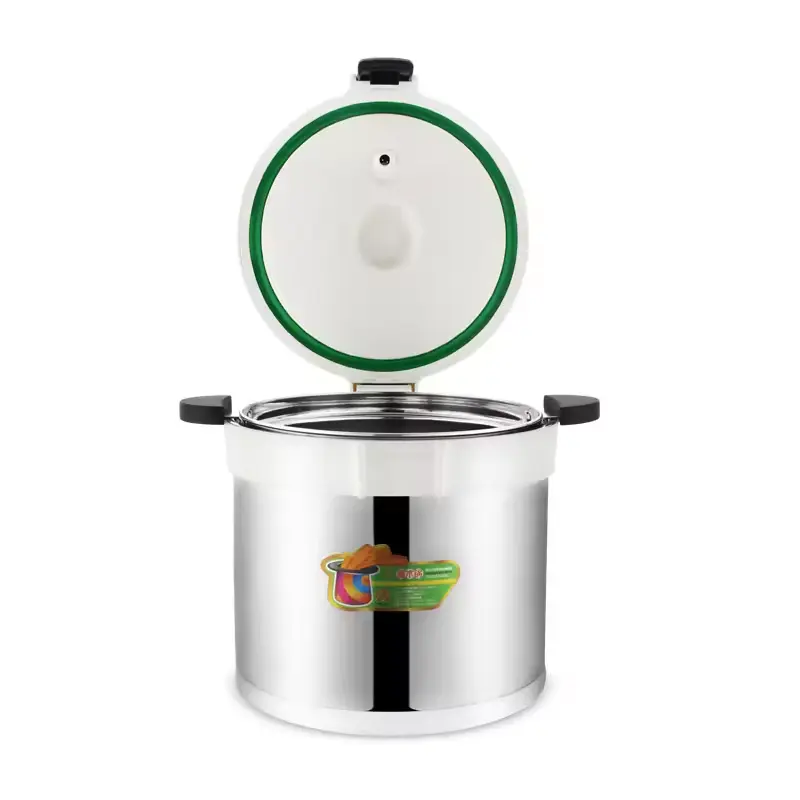
Inner Pot:
Direct contact with ingredients demands food-grade materials, for instance, 304 stainless steel, corrosion-resistant with optimal nickel-chromium ratios. Smooth, weld-free interiors reduce residue and simplify cleaning. Premium models add anti-stick coatings or aluminum/copper cores for even heating.
Outer Container:
The outer shell houses the vacuum layer, often stainless steel or plastic (lower-end models). But the real secret is the vacuum process. Using “deep vacuum + helium leak detection” (vs. standard vacuuming) can achieve 10⁻³Pa vacuum . This ensures ≤5°C heat loss in 12 hours. The outer shell’s curved design minimizes heat conduction through edges, paired with non-slip bases to prevent tilting and heat leaks.
Lid:
Airtightness determines cooking success. Lids feature “double sealing” that works like an inner food-grade silicone gasket (resistant to -40°C to 200°C) and outer locking clamps. Some models include a pressure relief valve—after boiling, lift the valve to release excess steam (prevents vacuum locks when cooling). New users often skip this step, but it’s key for insulation.
Using a Vacuum Thermal Cooker in 4 Moves
We’ve seen too many users blame the cooker for poor results—often due to misuse. Truth is, it’s simpler than you think. Follow these steps:
- Step 1: Pre-Cook to “Semi-Done”
Boil ingredients in the inner pot, for example, simmer soups for 10 mins or cook rice until grains split, sear meats until surfaces brown. This primes the ingredients for residual heating. Pro Tip: No need to fully cook!
- Step 2: Transfer & Seal
Place the boiling inner pot directly into the outer container (no need to cool), seal the lid, and lock the clamps (listen for a “click”). If your model has a pressure valve, lift it slightly to release excess steam before sealing.
- Step 3: Let Time Work Its Magic
Adjust insulation time based on ingredients:
Soups/Stews: 4-6 hours (richer, thicker texture);
Meats (ribs/beef): 6-8 hours (fall-off-the-bone tender);
Legumes (soybeans/mung beans): Soak for 4 hours first, then insulate 8-10 hours (easier to soften)
- Step 4: Enjoy Your Meal
After insulation, lift the valve (if present) to equalize pressure, then open. The food stays at 70-90°C—ready to eat, or chill and reheat later.
Why It’s a “Must-Have” for Modern Kitchens
Is it worth the cost vs. slow cookers/rice cookers? The answer is that it’s not just about cooking—it’s about efficient, healthy living.
Energy Savings: If you swap out an 8-hour daily use of a typical 150-watt electric slow cooker for our vacuum thermal cooker, you’ll notice a drop in your monthly electricity bill. Over a month, those savings add up to enough for a nice meal out. And when compared to using a gas stove—where you might burn through around 0.8 cubic meters of gas each month—the long-term savings with our vacuum cooker are even more impressive.
Hands-Free Convenience: Prep breakfast porridge in the morning, enjoy it at noon; start a stew on weekends, finish it after the gym. It turns “stove-watching” into “life-living”.
Safety First: No continuous heating, no electromagnetic radiation (stainless steel is non-magnetic)—safe for kids and seniors. The outer container stays cool (surface ≤40°C), preventing burns.
Nutrient Retention: Low-temperature slow cooking + vacuum insulation reduces vitamin C/B oxidation by 30% vs. boiling. Thinking of boiling vegetables, they will turn yellow because they have lost their chlorophyll. But that won’t happen in a vacuum thermal cooker.
Newbie Mistakes to Avoid: 3 Common Pitfalls
- Don’t Underfill or Overfill: 2/3 Capacity Is Key
Fill the inner pot to 2/3 full (max 80%). Too little: Compresses the vacuum layer, reducing insulation. Too much: Boiling overflow can clog valves or break seals.
- Skip “High-Maintenance” Recipes
Vacuum thermal cookers excel at “slow and steady”—not stir-fries or dishes needing constant attention (e.g., curries prone to burning). Stick to soups, stews, braised meats, and legumes.
- Never Ignore Lid Seals
Wipe the silicone gasket with a dry cloth before use because food residue ruins seals. After latching, gently shake the inner pot—if it wobbles, recheck the clamps. Replace silicone gaskets every 6 months (aging reduces elasticity).
Conclusion
The vacuum thermal cooker isn’t just a tool—it’s a vessel for “energy-efficient living”. It solves modern pains (time, energy costs) with simple physics and reliable materials.
If you’re a busy professional, a new parent, or an outdoor enthusiast, and you want to save energy or reclaim kitchen time, it is the right choice in your kitchen. After all, turning “cooking duty” into “joyful anticipation” isn’t about fancy gadgets—it’s about smart design that “gets you”.
Why choose Hengguang
- 🏆 Over 30 Years of OEM/ODM Experience
- 🔍 Strict Quality Control for Every Manufacturing Step
- ⚙️ Advanced Tri-Ply Technology for Professional Cookware
- 🌍 Global Market Service – North America, Europe, Asia & Beyond
- 🎯 Custom Solutions Tailored to Your Brand Needs
Hengguang, a brand that not only brings you products, but also a partner who can solve problems and create value for you. Contact us now and let us achieve greater possibilities together!


